Frequent drops or intermittent wireless connection - Windows 10
How to fix frequent drops or issues with intermittent wireless connection - Windows 10
How to fix frequent drops or issues with intermittent wireless connection - Windows 10
Symptom
This article only applies to devices that can detect a wireless signal and have successfully connected to a network but, are unstable and have frequent drop signals. There may be several causes for this issue. Try all the methods documented in the solution section to see which resolves the issue.
If you are unable to detect or connect to a wireless network and have no prior internet connection, contact Lenovo support.
Note: If there are intermittent issues, check for issues with the security, anti-virus, or firewall programs.
Operating Systems
Windows 10
Solution
Initial troubleshooting steps:
Make sure Wi-Fi drivers are up to date.
- Go to https://support.lenovo.com.
- Select Detect Product.

- Select Drivers & Software.
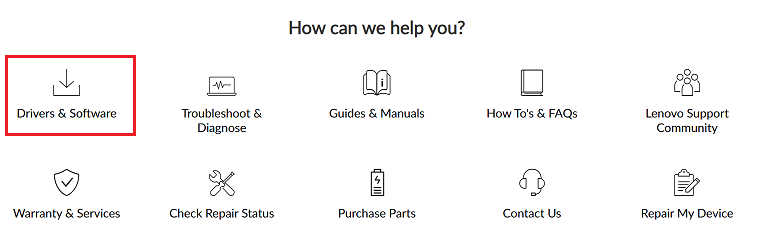
- Select Scan Now under Automatic Update.

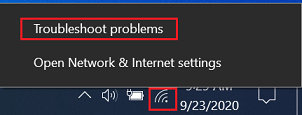
Run the Windows troubleshooter. Right-click the Wi-Fi icon and select Troubleshoot problems.
Additional troubleshooting steps:
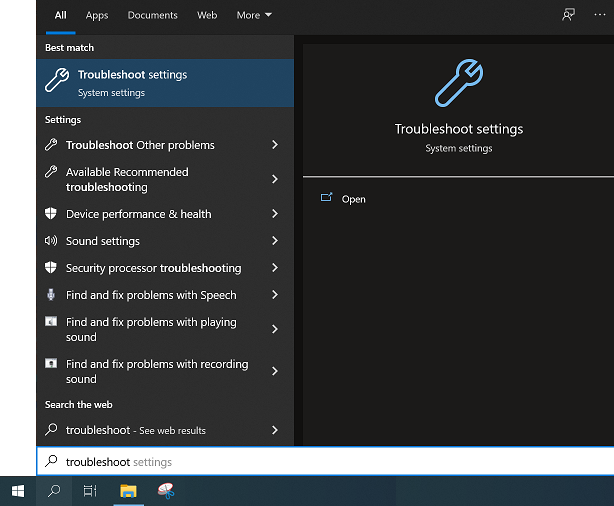
Method 1: Run the Network Adapter troubleshooter
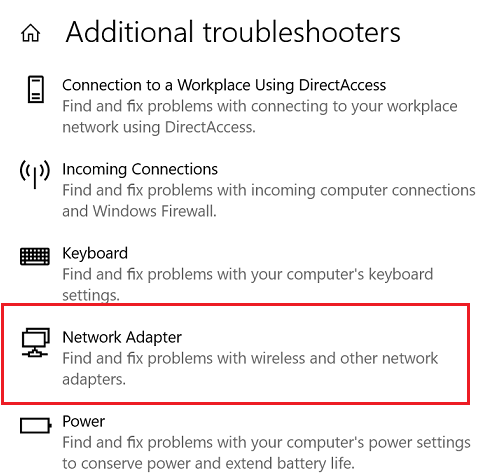
- Search for Troubleshoot.
- Select Troubleshoot settings.
- Select Additional troubleshooters.
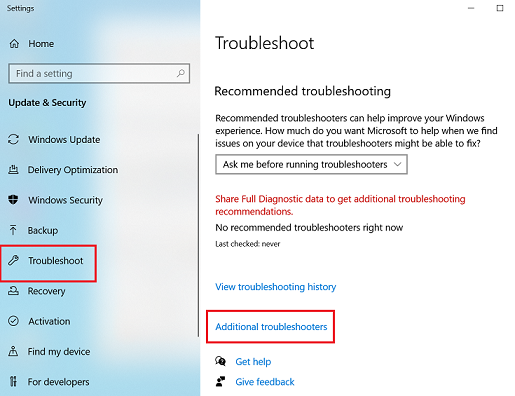
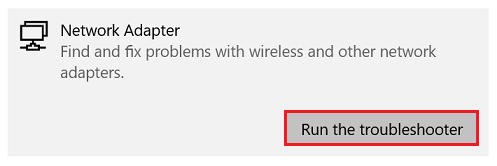
- Select Network Adapter.
- Select Run the troubleshooter.
For more details, see How to run Windows Troubleshooters - Windows 10 and Windows 11.
Method 2: Reset TCP/IP Stack and auto tuning
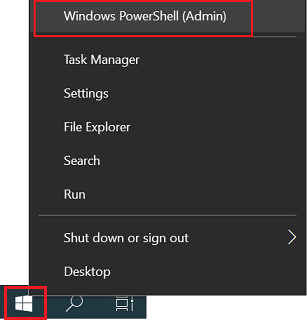
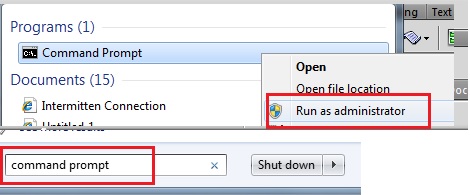
- Click Start menu and type Command Prompt. Right-click Command Prompt and choose to Run as administrator.
Another way to do this is to right-click the Windows icon and select Windows Powershell (Admin).
- Type the command NETSH INT IP RESET C:\RESTLOG.TXT in the command prompt window.
- Press Enter to execute the command.
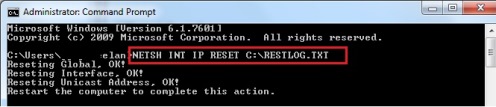
- On the following line type the command NETSH INT TCP SET HEURISTICS DISABLED and press Enter.
- Type NETSH INT TCP SET GLOBAL AUTOTUNINGLEVEL=DISABLED and press Enter.
- Type the command NETSH INT TCP SET GLOBAL RSS=ENABLED and press Enter.

Method 3: Wi-Fi power option
Check the power management setting in Windows 10.
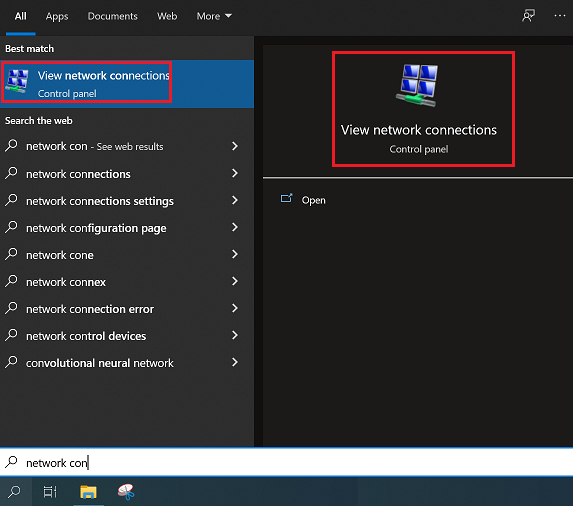
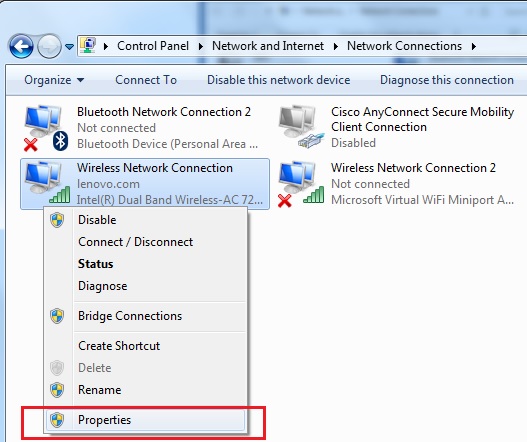
- Find the Wi-Fi device in Network Connections. Search for and select View network connections.
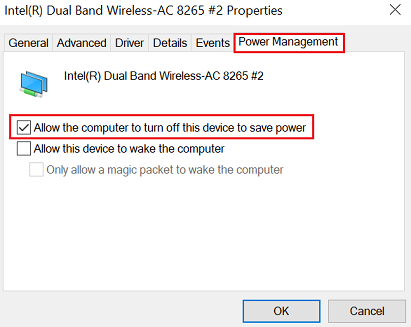
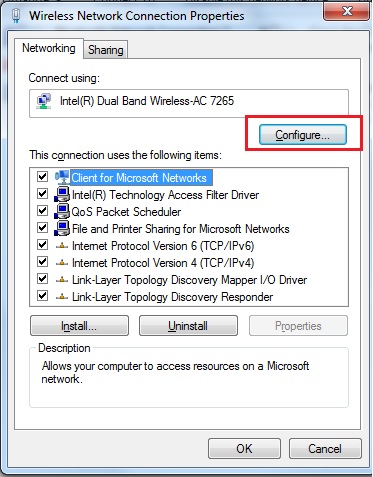
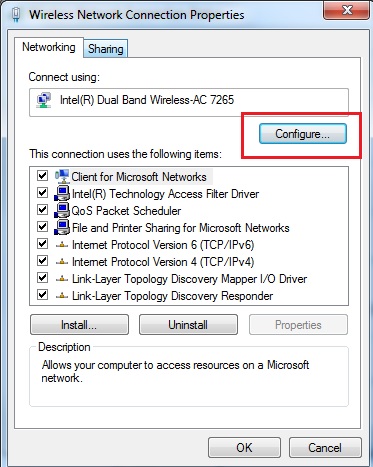
- Right-click the wireless connection. Select Properties.

- Select the Configure button.

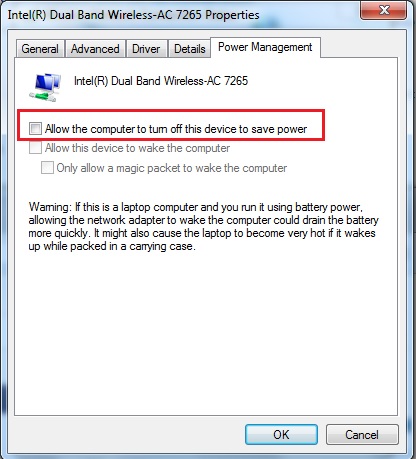
- Select the Power Management tab. Uncheck Allow the computer to turn off this device to save power.
- Select OK.
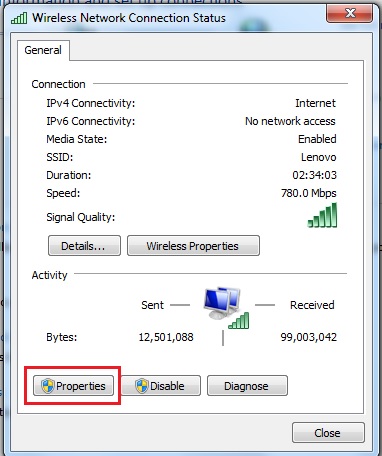
Use the following steps to check the power management setting for earlier versions of Windows.
- Click Start and search for Network and Sharing Center.
- In this window, choose the Wi-Fi network and the Wi-Fi Status screen will appear.
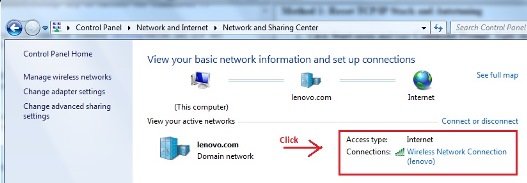
- Click the Properties button near the lower, left corner to open another window.
- In the Wi-Fi Properties window, click the Configure button.
- Go to the Power Management tab. Uncheck the Allow the computer to turn off this device to save power option and click the OK button.
Method 4: Reinstall the adapter
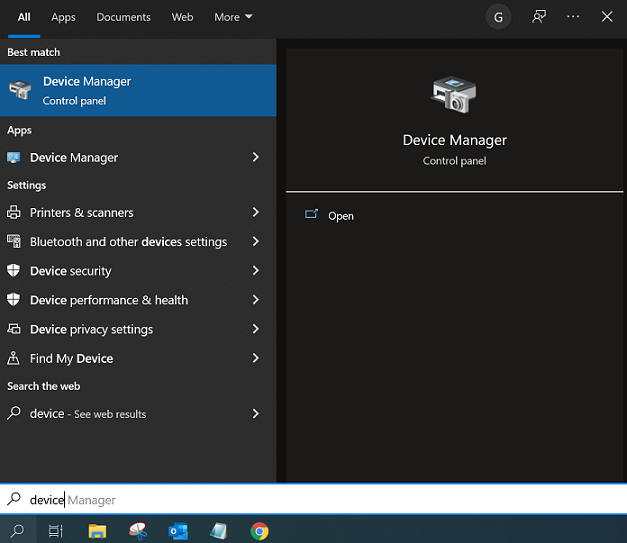
- Click Start and type Device Manager in the search box. Click Device Manager.
- Locate Network Adapters and expand the menu.
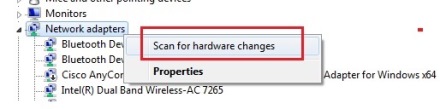
- Locate the network adapter and select Uninstall.
Note: The network adapter might be different from the sample image.

- Once removed, right-click Network Adapters again and select Scan for hardware changes.
- The adapters will be rediscovered. When the drivers are loaded back, the devices will re-appear in Network Connections.
- Please restart and try again. Restart is necessary.
If the adapter is not visible, select View, Show hidden devices in Device Manager.

Method 5: Revert network adapter drivers (Windows 10)
If you recently applied a major Windows update like Windows 10 Anniversary Update, the Network Adapter drivers that were installed along with the update may not be compatible. Try to roll back to the previous version of the driver.
- Visit https://support.lenovo.com.
- Select Detect Product or View PC Support. Select Browse Product next if you choose View PC Support, then select your product model.

- Click Drivers & Software.
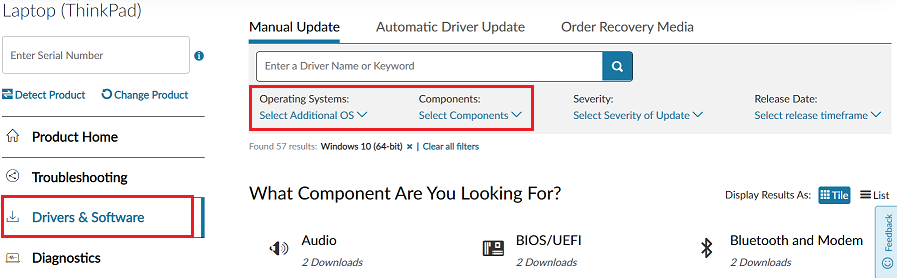
- Search for the previous version of the Windows drivers.
- Install the driver and reboot.
Method 6: Remove Lenovo Access Connection software (ThinkCenter , ThinkPad)
Windows 10
If you just updated to Windows 10, try removing the Lenovo Access Connection Software that is used as a connectivity assistant program. Removing the software will allow Windows Networking software to take charge.
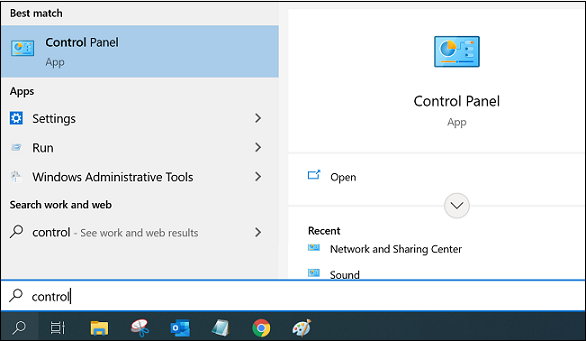
- Click Start and go to Control Panel (or search and select). See Where is Control Panel?.
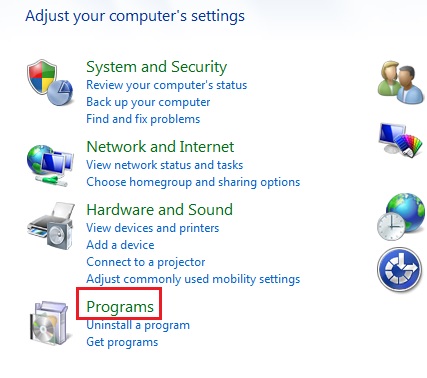
- Under programs, click uninstall programs.
- Look for Thinkvantage Access Connections.

- Right-click and select uninstall.
- Reboot the machine for this to take affect.
Method 7: Disable RDC (Remote Differential Compression)
If you do not have a server based PC, you may not need this feature. Deactivate the feature to utilize the maximum bandwidth of the connection. See the following method.
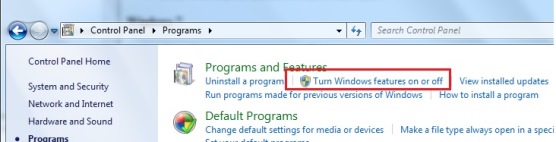
- Click Start. Go to Control Panel and access the Programs category.

- Under the Programs and Features sub-category, click Turn Windows features on or off.
- In the list of features, locate and uncheck Remote Differential Compression API Support.
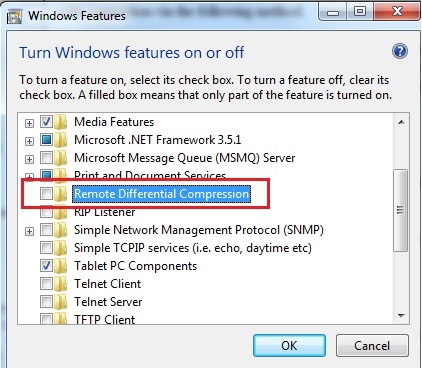
- Click OK.
Method 8: Disabling 802.11n Mode
These settings are working when you have N Wireless adapter.
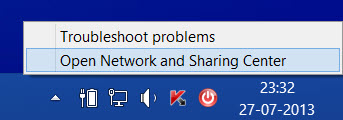
- Right-click the Wi-Fi icon present on the Windows taskbar and choose the Open Network and Sharing Center option as shown in the screen-shot below.
- Next, click Change Adapter Settings.

- Then, right-click the Wi-Fi adapter and select the Properties button. The Wi-Fi adapter that is installed on the computer might be different from the image show below.
- This will open the Properties box. Select the Configure option.
- Select the Advanced tab and search for the 802.11n Mode under the property. Select this mode and change the Value to Disable.

Additional things to consider:
- Locate wireless clients in a reasonable distance. The farther the distance from the router, the weaker the wireless signal will be. Try moving closer to the router to see if the connection improves.
- Move away from obstacles. Keep the router in the most central spot in the home and away from anything that might block its signal such as metal objects, bodies of water, reinforced concrete walls, televisions, microwaves, cordless handsets, and so on. Move Wi-Fi devices away from other transmitting devices, or turn them off when they are not in use.
- Change settings on the router. If the issue still persists, then try changing wireless settings on the router. You will have to log into the router’s management page. Contact your internet service provider or router manufacturer.
Related Articles
- [Video] Trouble connecting to Internet (Wireless)
- Popular Topics: Wi-Fi, Wireless
- Fix network connection issues in Windows
- Connect to a Wi-Fi network in Windows
- How to turn wireless Wi-Fi on/off in Window 10
- No wireless connection - Unable to detect any wireless networks in range - Window 10
- How to check wireless Wi-Fi signal strength - Windows
- How to enter or start-up into Windows Safe Mode - Windows 10
- Windows Support Center
Din feedback bidrar till att förbättra den övergripande upplevelsen